

Installing a 20 feet street light pole is a significant task that requires careful planning, the right equipment, and adherence to safety protocols. As a supplier of 20 Feet Street Light Pole, I've witnessed firsthand the importance of a proper installation process. In this blog, I'll guide you through the step - by - step process of installing a 20 feet street light pole.
Step 1: Planning and Preparation
Before you even start the installation, thorough planning is essential. First, you need to obtain the necessary permits from the local authorities. This step ensures that your installation complies with local regulations and safety standards. Check with your local building department to understand the specific requirements and application process.
Next, choose the right location for the street light pole. The location should be in an area where it can provide adequate lighting, such as along a sidewalk, a parking lot, or a street. Consider factors like traffic flow, visibility, and the presence of other utilities. Avoid areas with underground cables or pipes to prevent any damage during the installation process.
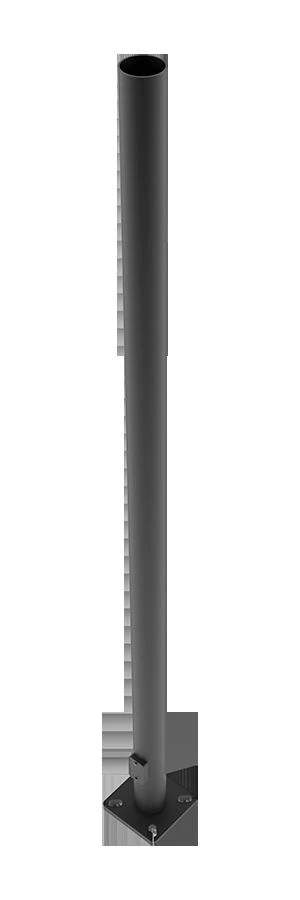

Step 2: Selecting the Right Pole
We offer a variety of 20 feet street light poles, including Round Pole and Octagonal Pole. The choice between a round and an octagonal pole depends on your aesthetic preferences and the specific requirements of the installation site.
Round poles are known for their smooth and classic appearance. They are often used in areas where a more traditional look is desired. Octagonal poles, on the other hand, provide a more modern and angular look. They can also offer better wind resistance in some cases. Consider the overall design of the area and the lighting needs when making your selection.
Step 3: Gathering the Necessary Tools and Materials
To install a 20 feet street light pole, you'll need the following tools and materials:
- Pole: The 20 feet street light pole itself, which should be made of high - quality steel for durability.
- Concrete: A sufficient amount of concrete to secure the pole in the ground. The quantity of concrete depends on the size of the pole base.
- Shovels: For digging the hole.
- Level: To ensure the pole is installed vertically.
- Wrenches: For tightening bolts and connections.
- Safety equipment: Such as hard hats, safety glasses, and work gloves.
Step 4: Digging the Hole
The size of the hole is crucial for a stable installation. Generally, the hole should be at least 3 feet deep and 2 feet in diameter. Use a shovel to dig the hole, making sure the sides are straight and the bottom is level. If the soil is particularly hard or rocky, you may need to use a jackhammer to break up the ground.
Once the hole is dug, place a layer of gravel at the bottom. This layer helps with drainage and provides a stable base for the pole.
Step 5: Setting the Pole in the Hole
Carefully lower the 20 feet street light pole into the hole. Use a level to ensure that the pole is perfectly vertical. You may need the help of a few people to hold the pole in place while you make the necessary adjustments.
Step 6: Pouring the Concrete
Mix the concrete according to the manufacturer's instructions. Slowly pour the concrete into the hole around the pole, making sure to fill all the gaps. Use a trowel to smooth the surface of the concrete. As the concrete dries, it will secure the pole in place.
It's important to note that the concrete needs time to cure. Depending on the type of concrete used, this can take anywhere from a few days to a week. During this time, avoid putting any stress on the pole.
Step 7: Installing the Light Fixture
Once the concrete has cured, it's time to install the light fixture. First, attach the mounting bracket to the top of the pole. Make sure it is securely fastened using the appropriate bolts and nuts.
Next, connect the wiring of the light fixture to the electrical supply. Follow the wiring diagram provided with the light fixture carefully. If you're not familiar with electrical work, it's recommended to hire a licensed electrician to ensure a safe and proper connection.
Step 8: Testing the Light
After the light fixture is installed, test the light to make sure it is working properly. Turn on the power and check if the light illuminates. If there are any issues, such as a flickering light or no illumination at all, check the wiring connections and the light bulb.
Step 9: Final Checks and Maintenance
Once the installation is complete, conduct a final check of the pole and the light fixture. Make sure the pole is still vertical and the light is shining in the desired direction.
Regular maintenance is also important to ensure the longevity of the street light pole. Inspect the pole for any signs of damage, such as rust or cracks. Check the light fixture for any loose connections or burnt - out bulbs. Replace any damaged parts as soon as possible.
Conclusion
Installing a 20 feet street light pole is a complex but rewarding process. By following these steps, you can ensure a safe and successful installation. As a supplier of high - quality 20 Feet Street Light Pole, we are committed to providing you with the best products and support. If you're interested in purchasing our street light poles or have any questions about the installation process, we encourage you to contact us for a procurement discussion. We look forward to working with you to illuminate your community.
References
- Local building codes and regulations.
- Manufacturer's instructions for the street light pole and light fixture.


